Showing posts with label party. Show all posts

2.05.2014

Casa Artelexia Party Packages

Craft Party Packages for Adults & Children

Cost: $300
Duration: 2 Hours (anytime between 11-6pm) 
Guests: 12, $15 per additional guest
Includes: All Craft Materials and Instruction, Invitations, Decorations, Goodie Bag, Clean-up

Cost: $500
Duration: 2 Hours (anytime between 11-6pm) 
Guests: 15, $20 per additional guest
Includes: All Craft Materials and Instruction, Invitations, Cupcake or Tamarindo Apple, Decorations, Goodie Bag, Agua Fresca, Fresh Mexican Style Fruit Cup, Clean-up

Cost: $800
Duration: 3 Hours (anytime between 11-6pm) 
Guests: 20, $35 per additional guest
Includes: All Craft Materials and Instruction, Invitations, Cupcake or Tamarindo Apple, Decorations, Goodie Bag, Agua Fresca, Meal (Tamales, Rice, Beans & Salsa), BYOB for those 21 and over, Clean-up

Additional Party Packages

Movie Night Party Package
Cost: $500 (only available in the evenings – you bring the movie of your choice!)
Duration: 2-3 hours
Guests: 25, $12 per additional guest
Includes: Projector, Seating, Snacks & Drinks (catered to your liking!), BYOB for those 21 and over

Loteria Party Package 
Cost: $350
Duration: 1.5 hours (anytime between 11-6pm) 
Guests: 20 guests
Includes: Snack Pack w/Drink, Announcer, Prizes, BYOB for those 21 and over

Our event space is available for private events, wedding receptions, corporate events, dinners and more!  Email us for availability and pricing at info@artelexia.com or call us at 619.544.1011.

12.31.2013

Confetti DIY's for a New Year's Celebration

Try these confetti DIY's for a New Year's Eve celebration:

1. Confetti Party Poppers by Honestly Yum:
2. Glittered Confetti Garland by Classy Clutter:
3. DIY Confetti Dipped Balloons by Studio DIY:
4. DIY Confetti Slingshot by Green Wedding Shoes:

11.25.2013

Delicious Mexican-Style Thanksgiving Recipes

Thanksgiving is a few days away, and we've rounded up links to delicious Mexican-style recipes to celebrate the occasion. And with recipes like Camotes al Chipotle, Calabacitas Rellenas, and Pumpkin Empanadas, you'll want to try your hand at these tasty meals, even if you don't celebrate:

1. Mexican inspired recipes from "Better With Butter":
2. Mexican-Style Thanksgiving Fiesta by "Muy Bueno Cookbook":
3. Mexican Thanksgiving Recipes from "The Other Side of the Tortilla":
4. A Mexican-Inspired Thanksgiving by "Saveur":
5. NBC Latino's 3 Sinfully Sweet Alternatives to Pumpkin Pie:

11.15.2013

DIY: Embroidered Alebrije Napkins

Alebrijes are some of the most varied and fantastical pieces of folk art in Mexico. They come in so many shapes, colors, and designs that it's impossible not to be inspired by them.

Since tabletop seems to be a common theme this week on the blog, we created alebrije inspired cocktail napkins that can be used over again and hand washed. You don't need to know much about embroidery to create a similar napkin, just a bit of patience and alebrije inspiration:

What you'll need:
-a needle
-embroidery thread
-a pencil (or pen if you want to live dangerously)
-fabric (we used muslin)
-a ruler
-embroidery hoop (optional-ours are hidden somewhere so we didn't use one)
-patience

What to do:
1. Figure out how big you want your napkin(s) to be (ours is 7"x7"), measure, and cut.
OR cut a piece of fabric that will fit over an embroidery hoop and begin drawing your design.
2. Draw your design lightly on your fabric (practice on paper first!) with a pencil, or pen.
3. Thread your needle with embroidery thread and knot the end of the piece you are using. Begin embroidering your design (you can start with the design first or the edges).
4. Use a blanket stitch (tutorial here) for the edges of the napkin. This will help hide frayed edges and gives the napkin a nice finished look. It also may help to put some liquid seam sealant before hand, which can be bought at a craft store like Michaels.

11.13.2013

Britt's Picks: Mexican Tabletop Inspiration

We're finally transitioning from the hustle and bustle of Dia De Los Muertos celebrations here at Casa Artelexia (save for our upcoming David Lozeau art show) and we're now back to our "normal programming" on the blog. Since we still have a few more holidays left this year, we'll be sprinkling the Casa Artelexia blog with related Mexican inspiration. Stay tuned!

Because thanksgiving is drawing nearer, I figured many of you (including myself) would be looking for some Thanksgiving table setting inspiration. So I've rounded up some Mexican themed tabletop for this week's Britt's Picks that you all can take inspiration from (I know I totally will!):


Images found here: 1 and 2, 3 and 4, 5 , 6 and 7, 8

9.24.2013

Day of the Dead DIY #15: Pom-Pom Waste Bin

A waste bin is an essential part of any celebration, but we know it usually isn't the prettiest part of your party decor. So for DOD DIY #15, we're taking bright, fluffy pom-poms and using them to spruce up a normally ugly looking waste-bin for a DOD party or celebration and making it accessible and fun to look at for party guests (and for that subsequent party clean-up!).

What you'll need:
-pre-made pom-poms
or
-a few skeins of colorful yarn (we have pink, purple, yellow, sparkly etc...)
-scissors
-this tutorial for making pom-poms

What we did:

1. We created our own colorful pom-poms using different colored yarns.
2. We wrapped yarn around the handles of the waste bin.
3. Then we attached a tuft of pom-poms to each handle on the sides of the bin and attached a foam skull.

9.19.2013

Day of the Dead DIY #13: DOD Cardboard Skull Mask

DOD DIY #13 is a fun multipurpose sugar skull mask that can be used for a Day of the Dead party as a prop, mask, table centerpiece, wall-hanging, and more.
What you'll need:
-paint (metallic, sparkly, etc...)
-paintbrushes
-scissors
-cardboard
-pencil
-stick
-string and ribbon

What to do:
-draw a skull shape on your cardboard and cut it out
-lightly draw out the designs you want on your skull with a pencil or paint
-paint your sugar skull, using bright, metallic, and sparkly paint
-glue your stick to the back of the mask
-tie some fun ribbon to your stick for some added flair!
Place your mask in a vase, umbrella stand or just about anywhere to display at your next Day of the Dead celebration!  Going to and party and don't want to show up empty handed?  This makes for a very thoughtful and unique gift for your host/hostess!

9.18.2013

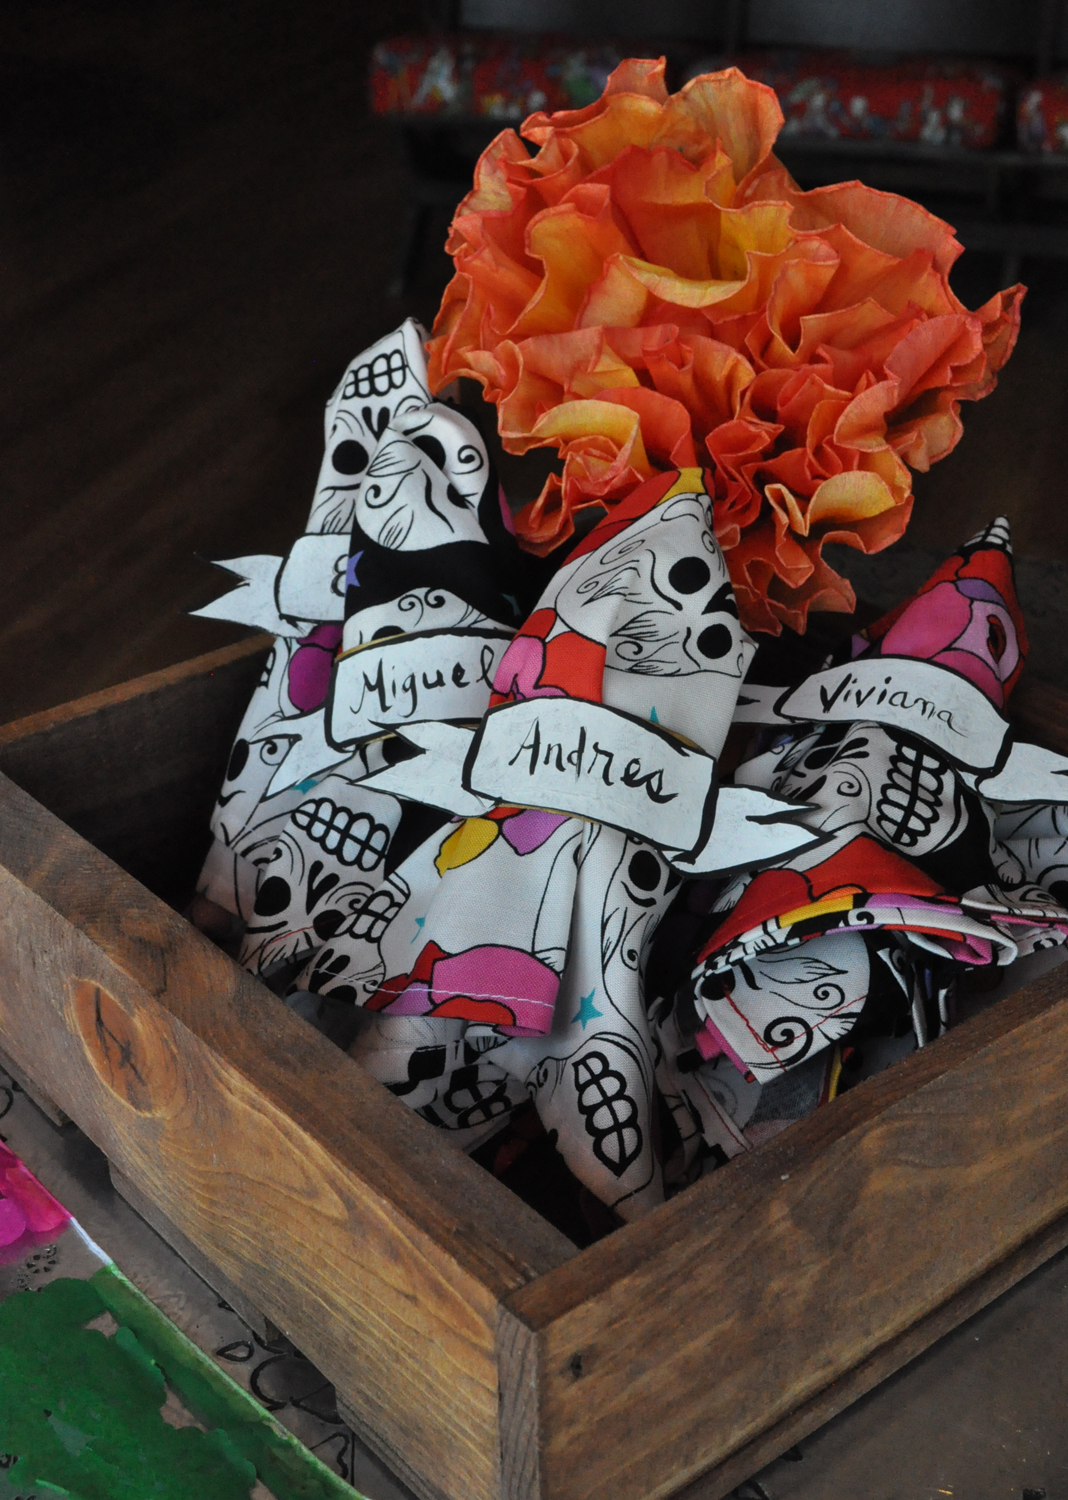
Day of the Dead DIY #12: DOD Napkin Rings/Place Cards

With Day of the Dead a little over a month away, there are sure to be many Day of the Dead themed parties and celebrations. That means there's lot of party decorating to be done, and we've made festive napkin rings/place cards to compliment any Day of the Dead tabletop decor!
What you'll need:

-napkins (available in store)
-glue 
-toilet paper rolls
-metallic gold or silver paint
-paintbrushes
-paper bags

What to do:

1. Cut approx. 1" rings from your toilet paper roll.
2. Paint the rings with your metallic gold or silver paint.
3. Draw your "ribbon" shapes onto paper bags and paint them (as shown).
4. Cut them out of the paper bag.
5. Glue them onto your painted rings.
6. Stick em' on to your Day of the Dead Napkins and set the table!

7.03.2013

Britt's Picks: Bohemian Garden Party


The summertime is my absolute favorite. I wait all year for these long days and warm nights (and needless to say I’m loving this heatwave). There is something enchanting and free-spirited about the summer that makes me want to gather with close friends and family and just enjoy the beautiful weather.

Bohemian style reflects the same free-spiritedness of the summer, whether it’s through fashion or home décor, and right now, the summer makes me want to throw a Bohemian themed garden party to celebrate. And with festive Bohemian tabletop and design inspiration all over the web, I couldn’t resist putting together a little inspiration board:

Images: 1, 2, 3, 4